Ultrasonic phased array detection of wind power spindle
Background
Wind energy, as a clean and renewable energy source, has received worldwide attention. The development trend of wind turbines is towards higher power, lighter weight, lower cost, and higher reliability. From the perspective of increasing power and reliability, foreign countries have conducted more research and application on new transmission chains, and developed various transmission schemes such as integrated, split flow, and direct drive to cooperate with medium and low speed generators.
The spindle is a key component in wind turbines, and its design safety and rationality will directly affect the performance of the entire unit. The phenomenon of spindle fracture also occurs from time to time, which has prompted wind power companies to pay more and more attention to the research of in-service detection methods for wind turbine spindles.
Test method
The wind turbine shaft is divided into many different types due to different models, and the structure of each type will also vary greatly. Moreover, due to in-service testing, the accessible parts for different models are also different. So for each different model, different testing processes and methods are required.
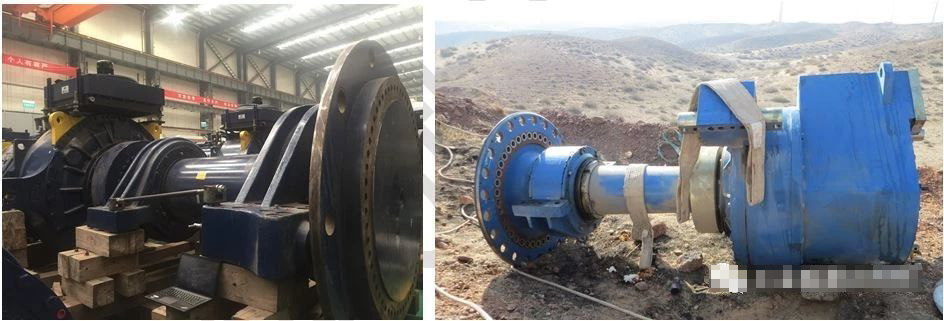
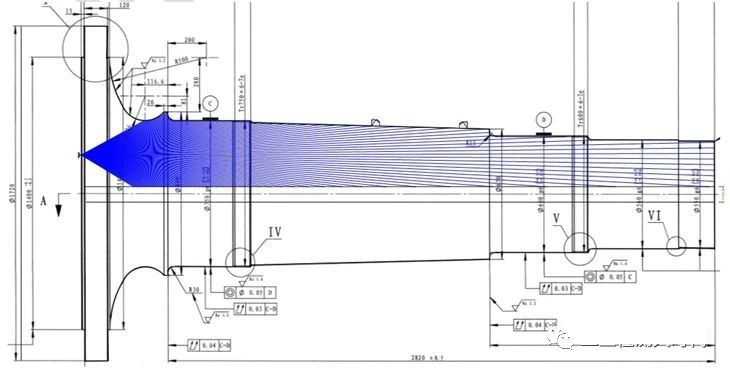
The area where probes can be placed can be generally divided into two parts: the shaft surface and the shaft end face. There are different phased array probes and settings for these two parts, and most of the detection focuses on defects such as cracks on the outer surface of the shaft body.
The shaft end face uses a 0 degree contact phased array probe, and the visible sound beam can cover the entire outer surface of the shaft surface.
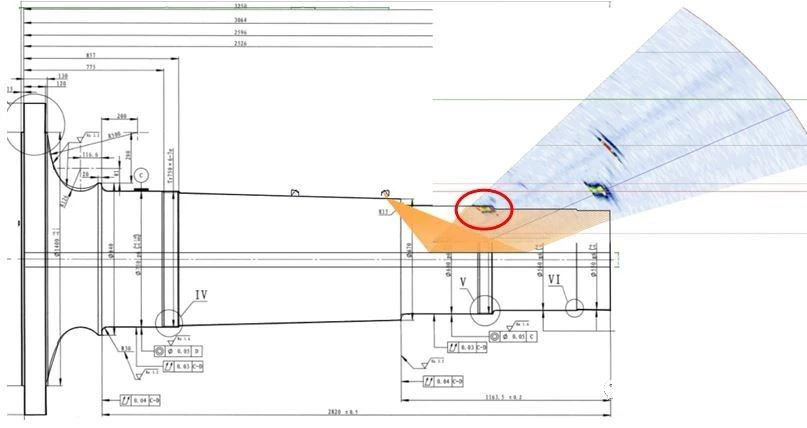
The axis body surface can be detected by using an oblique incidence probe and refracting secondary waves through the central hole
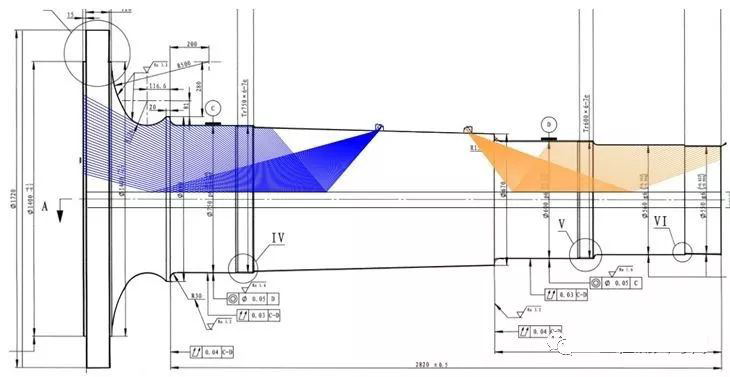
Combining zero angle and oblique incidence probes can basically be suitable for detecting different types of fan shafts
Detection result
The inspection results of the shaft end face are shown in the following figure, and each geometric shape reflection is clearly visible, and the signal in the front threaded area can be seen, as shown in the red circle.
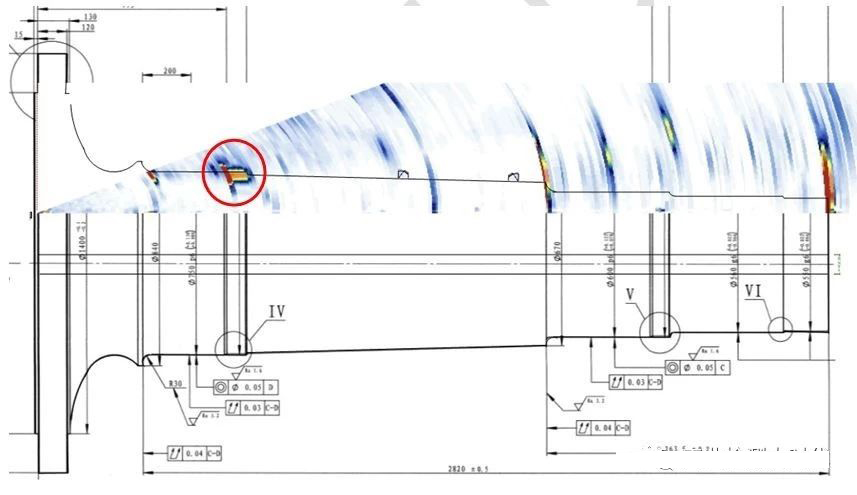
The detection results of the shaft surface are shown in the following figure. Using the center hole as the reflection surface, the thread signal at the rear end can be seen, as shown in the red circle.
Cnclusion
By using ultrasonic phased array technology, the geometric reflection of each part can be clearly observed in the detection of the shaft end face and shaft body surface, and the signal display position and depth match the actual geometric shape. Therefore, using ultrasonic phased array technology can also detect crack like defects on the shaft body.

